Thursday, November 26, 2009

PPA Challenge #18 K.I.S.S


HAPPY THANKSGIVING EVERYONE!!

Wow Great Food, Great Company, Great Times!

What a beautiful Thanksgiving, it was cold outside and rainy but it was warm and toasty inside with the people I love.

Here is a picture of what I used for table settings today. Even the baby had his own, although he can't eat half of what was in the bag. These were simple and quick to make, we had dinner at 1:00 and I made these about 10:00 a.m.. I only had to make 7 so it took no time at all. I ran the Stampin' Up! Fancy Favor die through the Big Shot using the Autumn Meadows Designer Series Paper from the Holiday Mini. I wrapped the 1 1/4" Chocolate Chip Striped Grosgrain Ribbon around the box and knotted it. The tag is from the Holiday Best stamp set which is a level 1 stamp set, I used my markers to stamp with and punched it out with the extra wide punch and attached this to the striped chocolate chip ribbon with a light brown 1/4" grosgrain ribbon. Then I filled the boxes with little treats for after dinner if anyone had room! Hope your Thanksgiving was "wonderful"!

Sunday, November 8, 2009

Sunday Evening

I've been working on My Christmas Cards this weekend and only have 4 completed. I didn't think they would take that long as they didn't seem to be that difficult when I looked at them in the beginning. So I quit working on them and have been reading email and looking for a dining room table and chairs on line. Looked for one in the stores this weekend but I don't want a pub style table and chairs. I'm only 5' tall so those chairs are a little high for me. I found a few on line so now I'm feeling better about the whole table shopping deal. Leave it to me to sell my dining room set before I found a new one. Now with the Holidays coming I need somewhere for people to sit. :0) Oh well, I wanted to post a picture of Brady in his new car! Remember he is a year old now. He needs his own wheels! This little car is like a big slipper. He sits down in it and he doesn't go anywhere but it honks and sounds like a real engine from the steering wheel. It has a side mirror that he likes to chew on and a key that fits in the ignition. We had so much fun with him when he was here this last time and he's such a little ham. He can be crying one minute and you bring the camera out and he's all smiles. Have a good week, I have to finish my Christmas Cards and get ready for my Christmas Card classes.
Happy Stamping!

Sunday, October 25, 2009

Brady's 1st Birthday!


Here are two pictures of Brady on his firetruck. The fireman outfit I got on line for under $10 on ebay. He had an ear infection so wasn't feeling well but he did pretty good with opening his presents and eating his cake.

Sunday, October 18, 2009

1st Birthday Party!

A first Birthday Party already....where does the time go? A year ago today our first grandchild was born. It takes three hours to get to Indianapolis from where we live and as we walked into the waiting room the morning he was born his daddy was walking in from the other side to let everyone know that he was born. Great timing. I didn't think you could love anyone as much as you love your own children but this little guy has stolen my heart forever! So today we took the 6 hour drive to be able to spend 5 hours with Brady for his Birthday. We had a wonderful time and the long day was worth every minute. So I wanted to post his Birthday Card I made for him.
It's not the traditional 1st Birthday Card but on the inside it does say Happy 1st Birthday. It is Stampin' Up! card stock, designer paper and embellishments. The stamp is not but it was so cute I couldn't resist. His daddy got him a bat and ball and he smiled really big when he got it opened. His mommy got him a remote control that talks to him and he didn't put that down. Oh no, two guys in one house with remote control! :) He also got some new books and bath toys. His great grandma got him a lawn mower that makes a lot of noise, yeah! He got a really neat piano, he just loves music and hitting the keys, pushing buttons and this does it all from Grandma and Grandpa G. And we got him a ride on fire engine with a bell to ring! He loved the wheels because they moved! He even got a little cake of his own and he was really very neat about it. So we enjoyed our day with the little guy, I'll post pics of him later riding on his fire engine.
Products Used:
Chocolate Chip, More Mustard, Dusty Durango and Water Color Cardstock
Autumn Meadows Designer Paper from the Holiday Mini
Dusty Durango Ribbon
The Tag Corner Punch and Star Brads from the Designer Series on page 179 of the Idea Book and Catalog

Friday, October 16, 2009

PPA Challenge #12 (Sketch)

This is the sketch that was designed by the Featured Sketch Artist, Margaret Moody for this weeks challenge. She has created a beautiful card for this weeks challenge also. Click on the PPA sign on the left to see her card and the other PPA designers. Try the challenge it's a lot of fun to see all the different designs and ideas.

I needed a thank you card this week and I just love the stamps from the Ronald McDonald set called "Very Thankful". For every stamp set sold Stampin' Up! donates $2.00 to the Ronald McDonald House Charity.

I used the Peacock with her beautiful plumes and jeweled crown.

I know everyone is fired up about the Holidays and making cards for them but I wanted something a little different. I found a scrap of the Bermuda Bay designer paper on my counter top and looked it up in the book to find out it was called "Thoroughly Modern" designer paper. I haven't used this color a lot but I really like it. Well I'm not an organized person and I knew I had more of this paper so I had to look for the folder it's in. Like always it wasn't where it's supposed to be. Well I found it and I fell in love with it all over again.
I wanted you to see the Peacock up close so I took a second picture, I hope it works so you can see the detail. It's fun to play at PPA!
Items Used:
Bermuda Bay textured cardstock
Soft Suede cardstock
Sahara Sand cardstock
Very Vanilla cardstock
Bermuda Bay and Rose Red Designer Paper from "Thoroughly Modern"
Bermuda Bay Designer Ribbon
Soft Suede, Bermuda Bay, Razzleberry, Always Artichoke and Summer Sun Stampin' Write Markers
And then I topped her with Iridescent Ice Stampin' Emboss Powder
The card is about 5 1/2 x 5 1/2

Halloween Bags, It's almost here!


TRICK OR TREAT!


Our little tricksters will need their candy bags when they go out for their treats on Halloween Night. Little bags for little people. My sister-in-law and downline, Angie Kindig stopped by last Sunday and we had so much fun. We made cards and bags, what fun!
The "Big Shot" provided us with the cutting machine we needed to cut out our "Build A Bear" dies. These Bear dies and their clothing dies come from the new "Holiday Mini". So take a look, shop right from your chair and you'll find some of the cutest products you've ever seen!
We used white bags with handles, great for little hands. The which bag was done in Basic Black, Pumpkin Pie, Creamy Caramel and Close to Cocoa. The pumpkin was done with Basic Black, Close to Cocoa, Chocolate Chip, Dusty Durango, Pumpkin Pie and Summer Sun. Also used The Eyelet punch and the Scallop punch. Dusty Durango and Pumpkin Pie Ribbon. Stop by my web page to shopand stop by Angie's at http://www.weluvtostamp@blogspot.com She has a really neat Halloween Card posted today for the PPA Challenge #12.

Sunday, October 11, 2009

PPA Challenge #11 Color


My oldest daughter's birthday is 3 days before Halloween and she'll be 30. While she was growing up she always got birthday cakes and cards that had to do with Halloween. So when I saw these colors it was an easy way to use the fall or Halloween colors in her card but make it birthday. So here is my take on this weeks color challenge.
I started out with an old olive base using Cottage Wall DS paper. Took a round flower stamp from the "Charming" stamp set with perfect plum ink on to perfect plum cs, then used the eylet border punch on that. Then I took pumpkin pie ink and the word stamp from "Charming" and stamped onto pumpkin pie cs, used the eyelet punch on this one also and glued the two together. Then I attached the two to the designer paper, wrapped the old olive pollytwill ribbon around it and into a bow. Attatched all of this to the old olive cardstock.
I took my markers to the long stemmed flower stamp from "Charming" and stamped it onto naturals ivory cs. Then I took left over pieces of old olive, perfect plum and pumpkin pie and layered it with the bottom torn. Added the floral piece last with dimensionals and stamped happy birthday on the pumpkin pie cs. I thought the card looked kind of bare at the bottom so I stamped the little florals on naturals ivory with perfect plum ink and then cut them out. I attached these to perfect plum cs and cut around the ivory and attatched it to the card. To give it just a little bit of glitter I used the two way glue pen on the flowers and added irridescent ice to it. I think she'll like this birthday card. It will be a little different this year. Thanks PPA!
Stamp Set: Charming
Cards Stock: Old Olive, Perfect Plum, Pumpkin Pie, Naturals Ivory
Ink: Old Olive, Perfect Plum, Pumpkin Pie
Embellishments: Old Olive Polytwill Ribbon, Irridescent Ice embossing powder, dimensionals

Friday, October 2, 2009

PPA Challenge #10 Gratitude and Thanks

I had to try out My Digital Studio and this is what I came up with.
I love the program. There is still a lot to learn but these were some of the simple things you can do with it. The first thing I did was pick out the picture I was going to use. I centered the
little guy and his puppy in the middle and then chose the colors, papers and embellishments around the picture. The color is Not Quite Navy Villa designer paper and Not Quite Navy Grid designer paper. It's neat because you can add the paper right on top of the picture and then send the designer paper to the back, there is your picture again. I then added the corner punch large and small in more mustard and crushed curry, then added a Not Quite Navy brad. I added More Mustard Grosgrain Ribbon and Bow. Then used a large oval punch attached it to the ribbon with more mustard brads and put the hugs and kisses sentiment on the oval that is from the Hoppy Moments stamp sets Greatest Moments. "A special not of thanks" saying came from the Cheep Talk stamp set. The bird came from the Embellishment section under Designer Kit Sunny Day Elements. This was made on a 12 x 12 page. It could be framed, the mat is already there and given as a thank you gift to someone special. Have a "tweet" week!

Saturday, September 26, 2009

PPA CHALLENGE #9, Picture Perfect Insperation

These are the challenges that scare me but I'm going to do it anyway. Here is the picture for the challenge from "Pottery Barn". They always have the prettiest pictures. So here we go again I tell myself. I've been thinking about this since Thursday and I finally got the paper and stamps out tonight, it's Saturday. :)

I started with my cardstock; I pulled out Always Artichoke, Really Rust, Pumpkin Pie, More Mustard and Very Vanilla. I also used Designer Series Paper, "To The Nines". Love that paper! Next came the stamp sets and after going through all the fall things I came back with some new ones, "Holiday Best" which is a level one Hostess Item and "Gobble, Gobble". I tried a few things with ink pads but couldn't come up with the colors I wanted so I went back to my markers, Chocolate Chip, Always Artichoke, Really Rust, Pumpkin Pie and More Mustard. I used the wide punch for the "Give Thanks"and used dimensionals to set it on 1" double-stitched chocolate chip grosgrain ribbon. I also used another 1/4 chocolate woven ribbon and wrapped it around the designer paper twice and tied a knot at the bottom. I layered the cardstock using all the colors except for Always Artichoke and used the Ticket Corner Punch. I added three pumpkin pie corduroy buttons which I sponged a little bit with ink. Thanks for stopping by!

Wednesday, September 23, 2009

My Digital Studio Is Coming!!!


October 1st it will be ready for purchase!
I've been playing with it a little bit and here are a few of the things I've done:

I made a flyer for my Friday Nite Scrap:


I used a little of just a few things available.


I also made a card for my grandson with his picture on it. Not sure how much he'll like it but I think his mom and dad will. He'll be 1 year old on October 18th. His Great Uncle Jeff will be 51 on the 19th of October! And his Aunt Sara will be 30 on October 28th.
This is really fun to play with and it is just full of options to choose from. Can't wait to create my first Album.
Thanks for stopping by!


Saturday, September 19, 2009

PPA Challenge #8 K.I.S.S.

"Keep It Simple Sweetie"
This is Challenge #8 from Pals Paper Arts.
Clean with lots of white space, simple designs, minimum time to create and limited layers and embellishments.


My card this week is a simple wedding card.

I used the Big Shot to make my card simple and fast.

I used the "Top Note" die first to cut my card shape with "Shimmer White" cardstock and then I sent it through again using the "Elegant Bouquet" embossing folder. This gave me a plain white card. I wanted something soft. I took a blending brush and Stampin Up's! Classic Stampin' Pads in Pale Plum, Certainly Celery and Barely Banana and went to work. In just a few minuets I had color in my Card. I added Stampin' Ups! Whisper White Organza Ribbon and the hardest part of all, the wording. I used the Stamp-a-ma-jig to place my words on my card so that I have a better chance of getting them straight or semi-straight. :)

I used the stamp "A Day to Remember, a Lifetime to Love." I just love the stamp set it comes from, it's called "Very Versatile" and it is. I just found out today that it is no longer available as it is not in the new catalog.

For any of the other items to make this card shop 24/7 from my web site to have your items shipped directly to you or give me a call, send me an email and I will order everything for you.

Have a good week and Happy Stampin!


Monday, September 7, 2009

Snow Man Thank You!

I know it's not quite Christmas yet but I have to start early or I will never get finished. I started first with the Christmas Thank You's I wanted to make for my Grandson Brady. He's only 10 months old but we may as well start early with the teaching. :) So I started out with the "Simple Seasonal Thanks" Stamp Set. I stamped the Snowman with Stazon Jet Black Ink, knowing that I'd have to do something with the hat and scarf at least. Then I took my "Real Red" Stampin Write marker and colored in the red polka dots on the snowman's hat and scarf. I then cut the snowman out and glued him on a piece of 4 x 5 1/2 " piece of real red cardstock and stuck the snowman on it. I applied sticky strip (double sided tape) to the cuff of the hat. I then applied white flocking (non stampin' up! product) to that. I used my marker again, this time only orange for his carrot nose. I needed an envelope for him since he is more like a post card than a regular card. I took one of Stampin' Ups' medium sized envelopes, added the striped paper on to it, trimmed it to fit. Now, I wanted to make about 18 of these so he would have plenty of them to send at the holidays but I needed a box for them. So I started looking around and came up with this window box made from "Merry Moments" Designer Series Paper and "Clearly Thanks" Window Sheets. The Window sheet looks like snow coming down. I made the box a little bigger than the envelope and at one end cut a rectangal for the window sheet. I attached this with Sticky Strip to the designer paper. I then folded the box and used sticky strip to attach the corners. I did the same for the bottom of the box leaving out the window. I put my cards and evelopes inside the box and added a 3/4" wide strip of red and white polka dot ribbon to the box to keep it closed. This will just slide off the end when you want to open the box.
To order these items to make the "Snow Man Thank You" just click the button at the side of my blog to shop 24/7 and it will be delivered to your door by UPS.
Thanks for stopping by.

Saturday, September 5, 2009

PPA #6 Color Challenge!


A color challenge! Beautiful colors aren't they?
Well I missed #4 because I ran out of time, darn job gets in the way every time. :) #5 I missed because I was to late getting my little sock monkey's costume on him. So now we come to #6 and I've finished early. This is just not like me. I procrastinate about everything! But her is my post. Mine is a Thank You Card this week. Take a peek.


I started out with that Brocade Blue as my card base. Then adding Beautiful Crushed Curry and using my "Big Shot" I embossed the top half of the card with Stampin' Ups! new embossing folder, Finial Press. The bottom portion was embossed with another embossing folder. I then added the half circle using Brocade Blue which was cut using my new circle scissor plus. I stamped the little guys on whisper white card stock using Stazon Jet Black Ink. He then got stamped a few more on Brocade Blue, Crushed Currry and Ruby Red. Well, I like to cut things out. I then glued their little shirts on them and gave them each a new heart! With Stampin' Ups! medium twill tape and my markers for the three colors I colored the "Thanks So Much"
stamp from the same stamp set. Attaching the twill tape I then flipped the ends of the little hearts over the top of the tape so it looks like they are standing at some type of table. The Crushed Currey and Brocade Blue are punched with the medium oval punch and the FRIEND is punced with a small oval punch and then sponged around the edges. The stamp set I used was the "Smarty Pants" set.

Monday, August 31, 2009

PPA Challenge # 5 Halloween!


Ok, so I know I missed the deadline for the challenge but I wanted to post my little guy anyways. He dressed up in his frog outfit for you so he was worth posting. He was done with the "Sock Monkey" stamp set, his pennant, hat, bannana and Kaleidoscope Designer Series Paper. I used Crushed Currey Cardstock along with Dusty Durango. I embossed the Dusty Duango with an embossing folder and then rubbed it with a sponge in Soft Suede. The Boo Pennent is three of his pennants put todgether. I also cut off the ears of his costume and they became his frog eyes with a little white ink and soft suede ink The ribbon is the new incolor polka dot ribbon in Dusty Durango and Crushed Curry. I hope you like sock monkeys new frog costume and if you see him out and about say hi to him! Ribit, Ribit. Send me a comment if you like what you see.

Sunday, August 30, 2009

Stamp A Stack Class 8/25

Another Stamp A Stack class and what fun! We made 8 cards and used more new stamp sets. I can't believe all the new stamp sets. They are so much fun and a few of them I would never have considered purchasing because I didn't see them in the catalog but I received them when I went to convention and I'm glad now that I have them.

This first card is from the Build a Bear Collection. She was stamped twice so that her clothes could be cut out and pasted on. Isn't she cute in So Saffron and Rich Razzleberry. She also has a brother in that stamp set but he'll have to wait his turn. :)

The next card is in Crushed Curry, Old Olive and Whisper White with a touch of melan mambo and Dazzling Diamonds for a bling effect. This card was made at convention with the "Hello Again" stamp set.

The next card is made with Orchid Opulence, Old Olive and Whisper White cards stock. Cottage Wall designer series papers are used along with the stamp set "Three Little Words".

The next card I made was with the New Fall set "Gift of the Earth". What a neat set! I used a neutral card stock I had not used before, Sahara Sand along with Bermuda Bay, Soft Suede and Very Vanilla Card Stock. I also used "Thoroughly Modern" Designer Serious Paper, Bermuda Bay Polka Dot Ribbon, antique brads, the new Modern Label punch and my water color pencils that I hadn't used in a very long time!

The last card I have pictured is really three cards in a bag (convention set) and the stamp set "Things I Love". The colors used are Melon Mambo, Bermuda Bay and Whisper White along with a cello bag. The topper for the bag was made with Melon Mambo toped with Melon Mambo ribbon and again topped with whisper white and Bermuda Bay. Things I Love is stamped across the top in Chocolate Chip. Doesn't that sound like Fruit and Cookies for Lunch?

The cards were made with Bermuda Bay, Chocolate Chip strip with Melon Mambo ribbon and Whisper White circles stamped in either a shoe, shopping bag or chocolate candy. Oh what a Life that would be! Each card then has an envelope stamped with Melon Mambo hearts. Very cute and a nice little gift for some lucky person.
These were so much fun to create! Hope you like, see you next time. :0)
If you have any questions about any cards or scrapbook pages please email me.

Friday, August 14, 2009

PPA CHALLENGE #3


Challenge #3 was a little harder than the first two for me. I've always seen people take a picture and create a card from what inspires them in the picture. I always thought I could never do that.


Here you can see the picture from the PPA challenge. When I look at that picture I see bold brights, a play room and a couple of little boys. Little boys like planes, trains and automobiles.


So here is my card for PPA Challenge #3. I used the stamp set "Choo Choo" and I used Brilliant Blue cardstock folding it to make an oversized card of 6 1/2 x 4 3/4. I stamped a piece of whisper white with a circle stamp from "Circle Circus" in bold brights of real red, brilliant blue, yo yo yellow and glorious green. I then wheeled my tracks on a piece of whisper white c.s. with black Stazon Ink and attached with dimensionals. I also stamped the train with the bold bright colors onto whisper white and cut them out so they would stand out with the help of dimensionals. I attached the train cars together with linen thread and mini dots, also the smoke from the engine which is attached to the happy birthday sign, with the help of an eyelet. I used the large tag punch to stamp the Happy Birthday and then trimed around it to make it a bigger tag. I took the tag punch and punched in from the corner about a half an inch top and side so that the ribbon would stay on the corner better. Click on the heart and try the challenge it's fun! It's really neat to see others perspectives on a single picture. Thanks for stopping by!
Supplies I used:
Stamp Sets: Choo Choo, Circle Circus, Happy Birthday

Card Stock: Brilliant Blue, Glorious Green and Whisper White.
Ink: Black Stazon, Brilliant Blue, Glorious Green, Real Red and Yo Yo Yellow
Accessories: 1/2" striped Real Red Grosgrain Ribbon, An Antique Eyelet, linen thread, Glue Dots and Dimensionals, Tag punch

Tuesday, August 11, 2009

Pals Paper Arts Challenge #2


This is my take on this weeks PPA challenge. I have a new great niece, her name is Anna Pearl after her two great great grandmothers. She is a beautiful little girl born last Tuesday morning right before convention. That has to be lucky right there!
I used Pretty in Pink cardstock and embossed it with the new embossing folder from Stampin' Up! "Finial Press". I've changed the card base and turned it on it's side. In the picture you can't see the scallops on the edges but they are there under the ribbon.
On that first layer I've added whisper white organza ribbon that I loosely gathered with needle and thread, attached it with sticky strip, trimmed and then added another layer of Pretty in Pink taffeta ribbon. To the taffeta ribbon I've added Soft Subtle Pretty in Pink Brads and buttons from the Button Latte group. Each button is tied with linen thread and attached with Mini Glue Dots. For my second layer I've added pink polka dots from the DS paper "Tea Party". I've scalloped the side along with whisper white card stock for a third layer. I've used the single stamp from Stampin' Ups! "Beautiful Baby", stamped it in the new In Color Soft Suede. I sponged the edges of these two layers. To finish the card I added a bow from the Pretty In Pink taffeta ribbon and a little creeper from the stamp set "Big On Spring". To this I added a little pink brad and I hung it on a rhinestone brad from the Circle Fire group to give it just a touch of bling. My card is a little different this time because I didn't want to cover up a lot of the embossing so I used that as one of my layers. I hope you like it!

Sunday, August 2, 2009

Pals Paper Arts Challenge #1


This is the first challenge I've ever attempted and it was fun! The challenge: A color challenge using Stampin' Up! products. The colors are Melon Mambo~Bermuda Bay~Chocolate Chip.
I've used the stamp set "Wings of Friendship" which is a Level 1 Hostess Set.
I started out with a standard card base opening on the right of Melon Mambo. I then used the flourish stamp inked in Melon Mambo for a tone on tone print. I used the eyelet border punch for the side edges of Bermuda Bay and Chocolate chip cardstock, layered them on the Melon Mambo and added the Melon Mambo polka dot ribbon to tie it together. I stamped the viney branch in Bermuda Bay on Bermuda Bay and cut it out. I then stamped the bird and flowers on very vanilla, cut them out and attached with dimensionals to the cardstock. I added a little bling for the birds eye and a gold brad for the center of the flower. I stamped the verse in Bermuda Bay ink on very vanilla cardstock and punched it out using the square scallop punch. I then attached it to the vine with another gold brad and a dimensional on the bottom to keep it in place.
It was a great challenge and I love the colors that were chosen. Can't wait to see what they have next week. Thanks for stopping by!

Saturday, August 1, 2009

Scrapbook Night last night from 5:00 p.m until 11:00 p.m.. I think I went to bed at 2:00 a.m.. It was a great night though, pizza turned out well again, lots of conversation, laughing, and helping each other. Great Time! We even did some scrapbooking. There were 7 of us and we really had a good time. I finished two more pages of my grandsons album. This about the only time I get to sit down and scrapbook and it's so much fun to do it with other people because you can talk and laugh about it. Last night we told stories, some of them were recent and some were childhood, some were family and kids and grandkids.


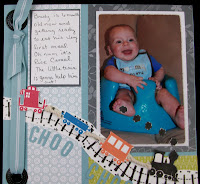
These are the pages I did last month with the stamp set Stampin' Up's "Choo Choo" stamp set. Brady ate cereal for the first time that day. Like any baby at first he wasn't sure but after a few bites he got into it and then it was Yummy for his Tummy!


This month I used a retired Stampin' Up! Scrapbook Kit called "Rock-A-Bye Boy". It just recently retired when the new catalog came out but in it's place they have brought in some really cute Kits including "Happy B Day" in primary colors and "Cool Kids" which is for all ages of children. These Kits are still called "Simply Scrappin" and still at the same low price of $19.95


Check them out in the new catalog on pages 164 through 167.


Wednesday, July 29, 2009


Tonight I put up my new Decor Elements from Stampin' Ups! "definitely decorative" mini. They are really cute! This group is called "Flower Garden" It is the smaller ones for $12.95 and there are two groups here. They are so easy to put up, I was surprised at how simple. The instructions say they are easily removed also but I won't go there right now. Just got them up and all! So I'll post a pic if I can and you tell me what you think.

Monday, July 27, 2009

Hi,


My first post on my very own blog. What a day!


Until I figure out how this works I'm just going to post some of the things we've done in workshops, classes and scrapbook nite.


I had a "Stamp A Stack" class last week and I have another class this Saturday. Here are a few of the cards we are making.